Hi All this is my new post on SoapUI which describe about
the Database testing in SoapUI tool, which is mainly helps in validating your
SoapUI response and the actual value present in Database.
In this
post I will describe how to do Database testing like, how to get connection
with Database from SoapUI tool.
Before starting Database testing we have to get connect to
the Database from the SoapUI, so we can get connection to the Database in 3
types, here in this post I will describe all 3 types of connection with DataBase
from SoapUI.
Type I:- Get Database connection at Project level,
by just following below steps.
As I
described in my previous post how to create Project, Test Suite and Test Case. Create
project and right click on the project you created or double click on it and
follow the steps, open the Project View.

Once you select or clicked on ‘Show Project View’ you will
see the below screen in the right pane of SoapUI window, and after that click
on ‘JDBC Connections’

And you will be seeing JDBC Connection pane in which we have
to create New Database Connection, now follow the steps marked in the
screenshot, once you click on the “+” sign as marked new popup box open, enter the DB Connection Name, and click OK,

Once you entered the DB Name and
Click OK, you will see the below popup where we need to enter database details
as shown in the below screenshot

Click ‘Test Connection’ button to test the Database Connection, once after you filled all correct value into it, if all the details are correct you will see message as “The Connection Successfully Tested”
means successfully connected to the Database.[Here I have selected the Driver
as “Oracle Thin/Oracle Jdbc Odbc driver”] as shown in below screenshot,

The same DB Name can be used in the in your Test Case JDBC Request
step.
Type II:- Here we will see how directly we get
connection to the database from JDBC Request Test Step in the Test Case. Here
you can see the above created, DB name you can use the same or you can create
new one. Here how it is as shown in below steps.
Add your request to Test Case (Follow my previous post to
create Test Case and add request to Test Case). Now add JDBC Request to the
test step.

Once you added the JDBC Request to the Test Step, open that
step by double clicking or right click and select ‘Open Editor’. Then JDBC
Request window will look like below screen.

In above screenshot as you can see the DBConnect name as it
was created in the in Type I.
Assume you have not created or not connected to Database at
project level, and now you want to connect to the Database at Test Case level,
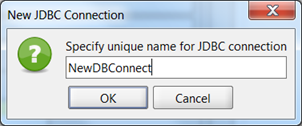
then you can select or Click on “<Create New>” option, once you selected
‘Create New’ you will see below screenshot New JDBC Connection popup box here
enter the DB name, here I have entered DB name as ‘NewDBConnect’
Once you Click ok you will see below window, in this you need to
enter all the details to get connect to Database.

In above screen you can select any driver as per your need or as per your database, here I have selected Oracle Thin/JDBC driver. As
shown in below screen.

Once you selected Driver, after that you need to provide all
the details as Hostname, username, password, Port and SID and Click on Test
Connection, if you get message as “The
Connection Successfully Tested” means successfully connected to the
Database. As shown in below screenshot.

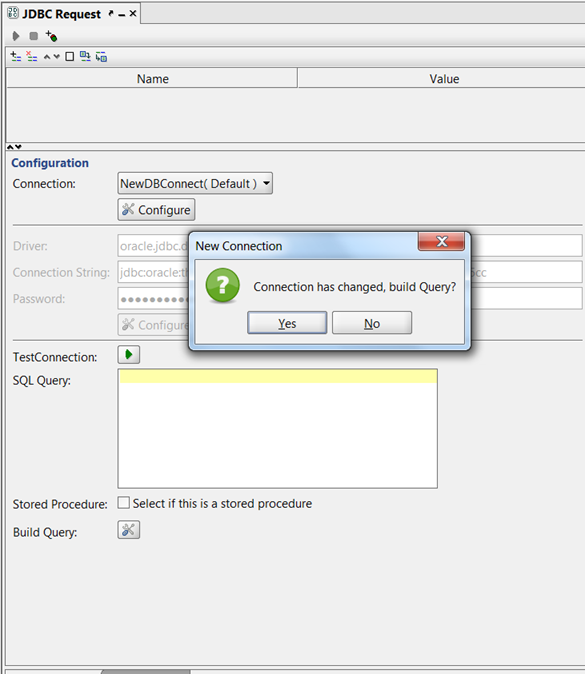
Once you click on “OK” button you will see below message
box asking for take out to the new window where you need to build the query or select the
table or write your own query to retrieve the result. In below screen select
‘Yes’ button you will see the next screen where you will find all the table
which are present in your database as per your user access.
Once you are satisfied with your query build and you got the
expected result, then just click on OK button,

Now you will come back to same JDBC Request window, and you
can also see the query which you built in above screen in JDBC Request.
Once you execute this query you will see query result in XML format or in
form format in JDBC Request right pane, as shown in below screenshot.

Type III:-
Now we
will see how to connect to Database from the Groovy script, just add the ‘Grooy
Script’ test step to your test case as shown in below screen.

Once you added the Groovy Script to the test case, write
connect string to connect to database as shown in the below screen.

Here, Type-I and Type-II difference is, In Type-I, we create DB connection at project level then can use the same DBConnect
reference throughout the project and use that in JDBC Request. In Type-II its
just related to that particular test case and you cannot use outside the test
case. This type of connection useful when you have to use different database
for each Test Case then this will help you.
I hope this will help you in your project for Database
testing.
In next post I will post some useful sql queries to retrieve
the data from table in Groovy script.
That’s all Folks.